 DReS Robot Cell Simulator - Load and Visibility: Available Objects, Selection File, Transparency (YouTube, English)
Toolbar and View menu
| Function | Description |
| Fit All | shows the whole scene |
| Zoom / Zoom Area / Pan / Rotate | mouse modes of the view (the default mode selects parts) |
| Axes, Perspective | coordinate axes on / off, perspective or parallel projection |
| Standard views | default, top, bottom, left, right, front, back |
| Screenshot | saves the 3D view as an image (see below) |
The View menu switches the helper objects: robot labels, robot recorded path, null point and grid. The context menu of the 3D view contains Fit All, white background, the size of the coordinate system, Hide / View only / View all, the paths (Hide all paths, Show paths, point labels) and the paths of all robots.
Camera
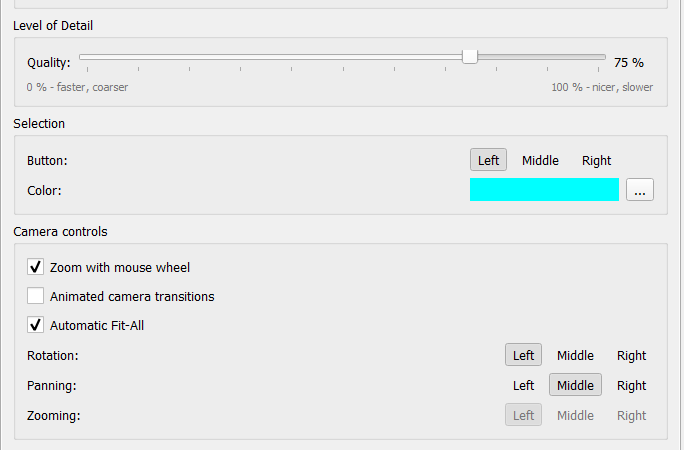
The mouse buttons for selection, rotation, panning and zooming are set in the Settings tab (Camera controls); Zoom with mouse wheel is the first option there. Animated camera transitions and Automatic Fit-All can be switched off for very large scenes.
Transparency
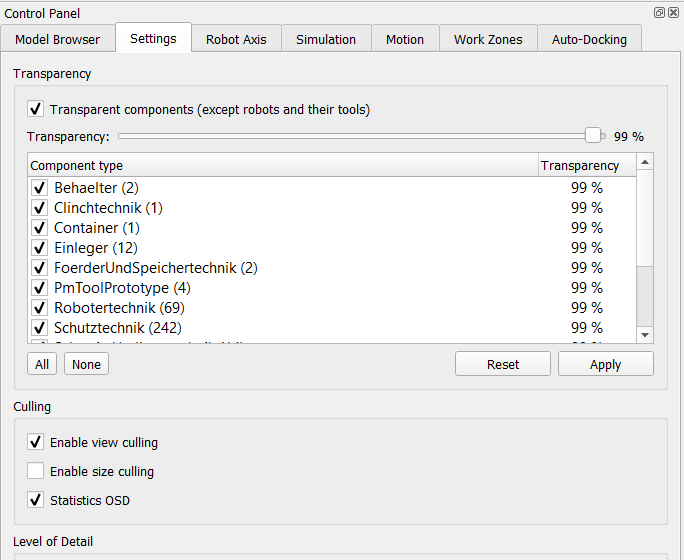 |
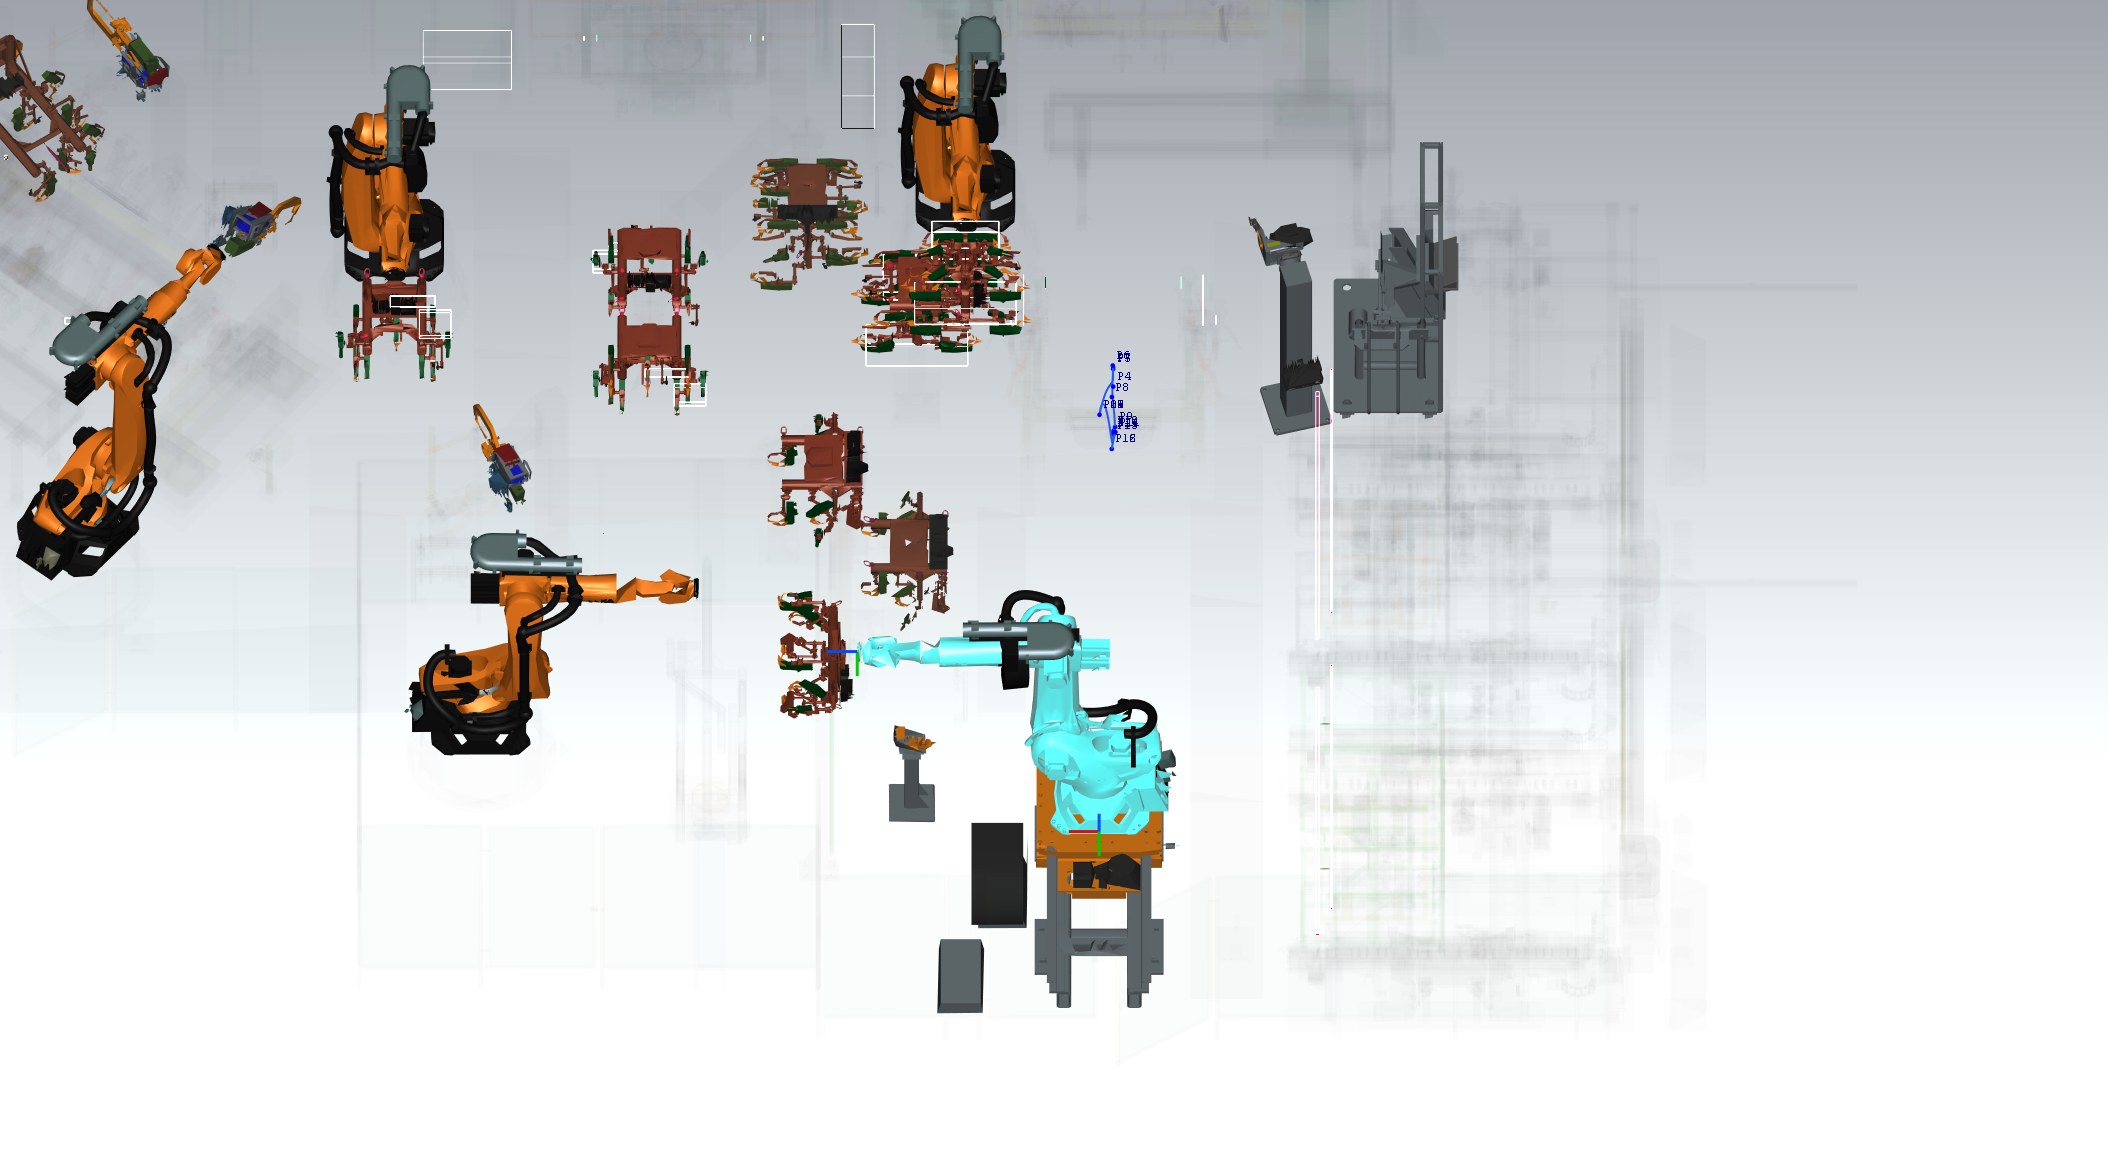
Transparent components (except robots and their tools) makes the fences, conveyors and other equipment transparent so that the robots are clearly visible. The slider sets the transparency for all types; the list sets it per component type. Apply applies the values, Reset restores them. Robots, the tools on the robots and the tools in the docking stations always stay opaque. A single item can be changed with Set transparency... in the context menu of the Model Browser. |
Culling, level of detail, selection
 |
|
Screenshots
The last toolbar button saves the 3D view as PNG or JPG. The image is rendered in the resolution of the view, independently of the panels around it – well suited for documentation.